Hexagons! (And a Mini-Tutorial) I've been wanting for ages to make a hexagon quilt but wasn't in love with the idea of sewing them together by hand. I found a tutorial for Y-seams (eek!) and set about learning how to cut hexagons without a template!

Yes, this one is made out of paper. I wanted to make sure I was doing it correctly before I cut into my precious fabric. I found a tutorial that shows how to cut hexagons with a 60 degree ruler! First, I cut a piece of paper 5 1/2 inches and folded it in half lengthwise.

Keeping the fold at the bottom, I lined up my 60 degree ruler with the point at the top and placed a sticky note along the bottom edge at 2 3/4 inches...
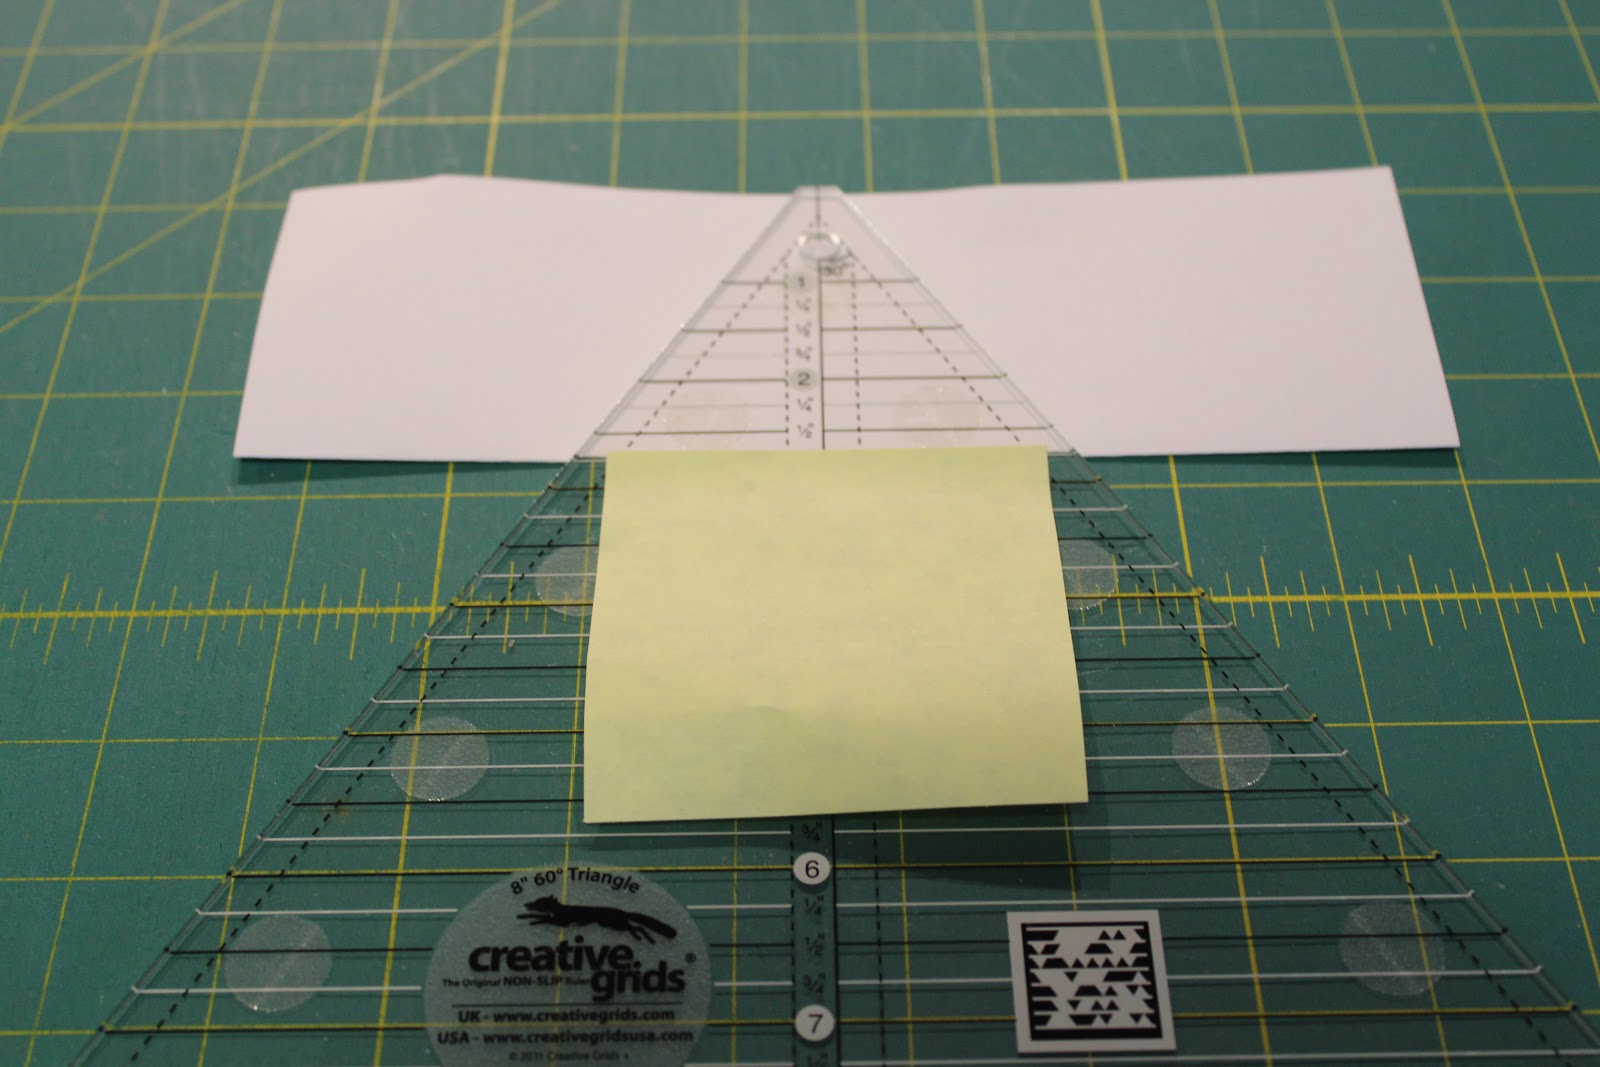
Because the top of my ruler is flat, I realized after cutting zillions a few hexagons that I had to actually move my sticky note up 1/4 inch to the 2 1/2 inch line. The ones I cut before I did this had uneven sides. All sides of the hexagon should be the same - in this case 3 1/4 inches. Here's what it looks like after cutting both edges...

Open it up...and voila!
Hope this is clear. If not, email me and I'll try to explain it better. There are definitely better tutorials out there, but I thought I would show you the method I used. I managed to get most of my 'fabric' hexagons cut this afternoon. I pulled out my vintage repro fabrics, which I haven't used for ages. I have an on and off love affair with these fabrics (mostly on)! They are so cute and it's no secret I love anything vintagey! I also found some blocks I made a few years ago and had completely forgotten about! Oops! Anyway, here's my nice little stack of perfectly (I hope) cut hexagons.

All I need to do now is master those dreaded Y-seams! Wish me luck!
No comments:
Post a Comment