Sunday, February 24, 2013

ONE NEW THING WEEK 9!

Oatmeal Cookies with Butterscotch Chips!

Well...I didn't get around to working on my Y-seams this week (see previous post) but I did make these cookies which have been on my list for ages!  Nothing fancy...they're just oatmeal cookies but with butterscotch chips!  For some reason, I've never used butterscotch chips.  I've bought them before but ended up just eating them out of the bag.  Anyway, these cookies are delicious! They're quite different from oatmeal cookies I've made in the past.


They spread out quite a bit on the cookie sheet (perhaps due to the 1 1/2 pounds of butter) and they are quite flat. I had to eat three just to make sure they were okay!  (Guess I'm going to the gym later!)
They're called Scotchies and the recipe is from this book...
 
 
This was a gift last year from my nephew.  The recipes are from a bakery in New York City of the same name - Milk & Cookies.  This is the third recipe I've made from the book.  I made the biscotti and it turned out perfectly.  I have a plan to work my way through this book making every recipe.  Some are quite complicated so I'm not sure how successful I'll be! 


Sunday, February 17, 2013

ONE NEW THING WEEK 8

Hexagons! (And a Mini-Tutorial) I've been wanting for ages to make a hexagon quilt but wasn't in love with the idea of sewing them together by hand.  I found a tutorial for Y-seams (eek!) and set about learning how to cut hexagons without a template!
 

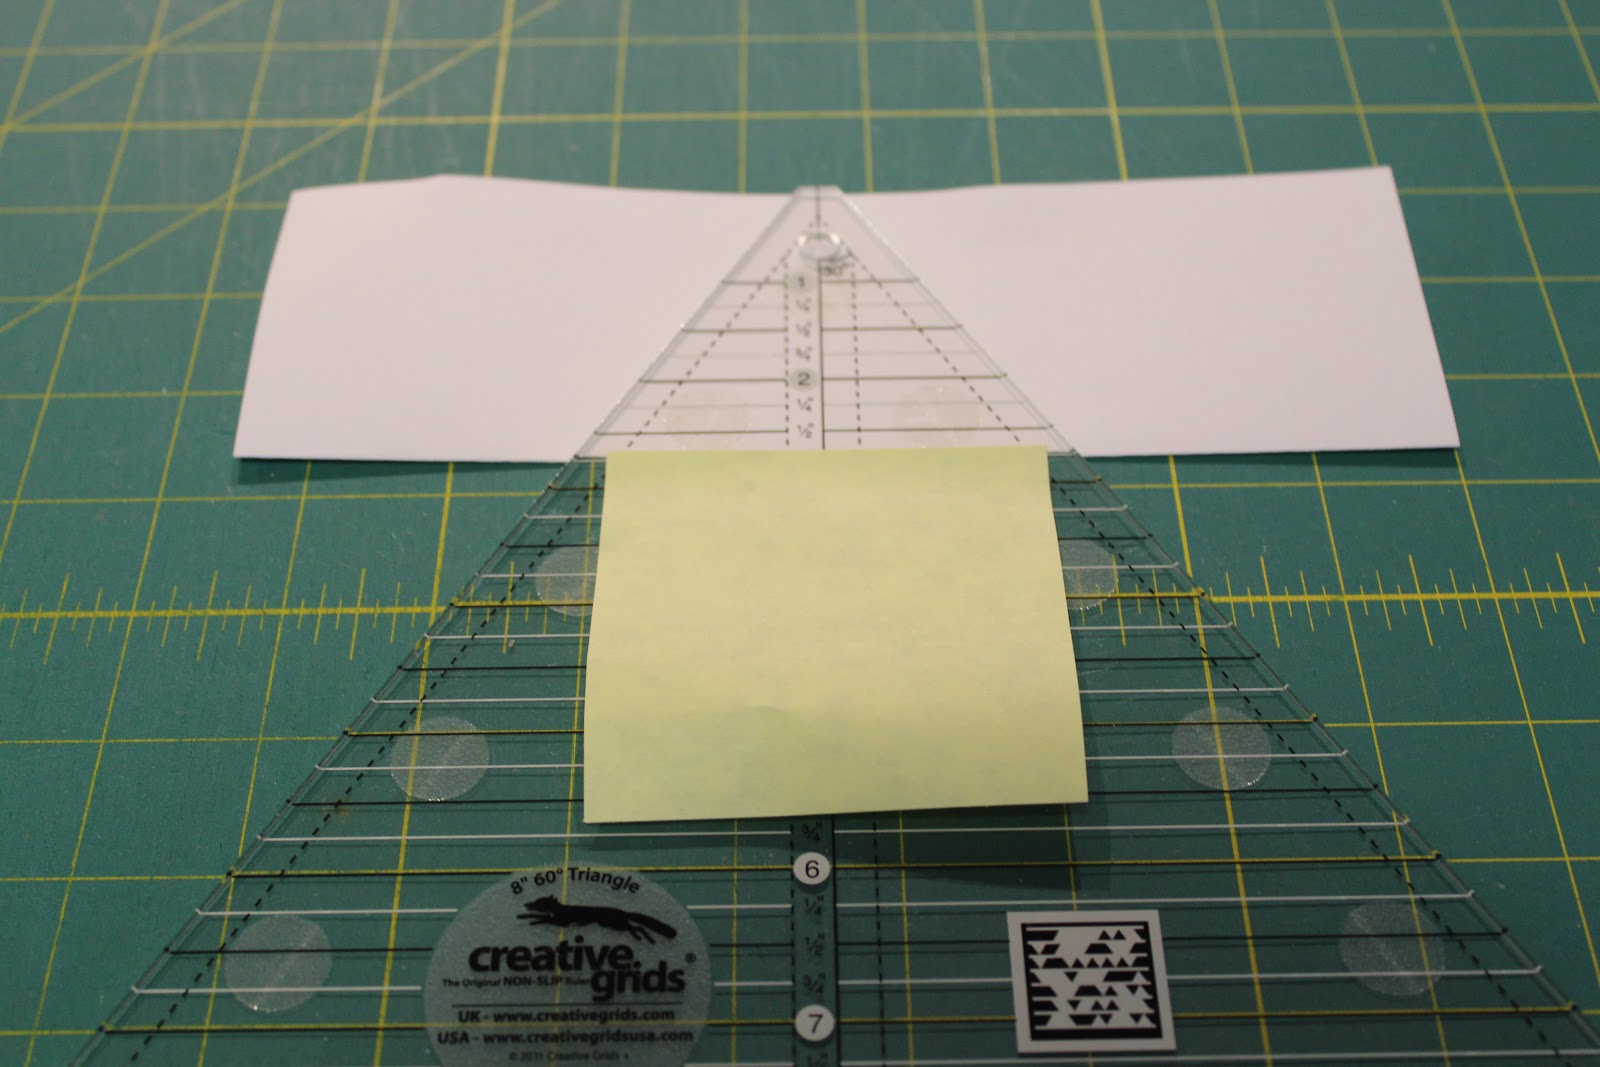
Yes, this one is made out of paper.  I wanted to make sure I was doing it correctly before I cut into my precious fabric.  I found a tutorial that shows how to cut hexagons with a 60 degree ruler! First, I cut a piece of paper 5 1/2 inches and folded it in half lengthwise.  

 
Keeping the fold at the bottom,  I lined up my 60 degree ruler with the point at the top and placed a sticky note along the bottom edge at 2 3/4 inches... 
 
 
Because the top of my ruler is flat, I realized after cutting zillions a few hexagons that I had to actually move my sticky note up 1/4 inch to the 2 1/2 inch line. The ones I cut before I did this had uneven sides.  All sides of the hexagon should be the same - in this case 3 1/4 inches.  Here's what it looks like after cutting both edges...
 
 
Open it up...and voila!
 
 
Hope this is clear. If not, email me and I'll try to explain it better. There are definitely better tutorials out there, but I thought I would show you the method I used.  I managed to get most of my 'fabric' hexagons cut this afternoon. I pulled out my vintage repro fabrics, which I haven't used for ages.  I have an on and off love affair with these fabrics (mostly on)! They are so cute and it's no secret I love anything vintagey! I also found some blocks I made a few years ago and had completely forgotten about! Oops!  Anyway, here's my nice little stack of perfectly (I hope) cut hexagons.
 
 
All I need to do now is master those dreaded Y-seams!  Wish me luck!


Sunday, February 10, 2013

ONE NEW THING WEEK 7

Sugar Cookie Bars!!!
 

I think sugar cookes are my favourite cookie of all (especially those made by my SIL - Hi Jeanette - who makes the absolute BEST sugar cookies)!  However, some of us are too lazy busy to spend all that time making the dough, chilling it, rolling it out, cutting them out, blah, blah, blah!! Anyway, I came across this recipe (on Pinterest, I think) and decided to give it a try! They are actually very tasty and a quick alternative to the actual cookie. This one is definitely a keeper.  The only change I made was to the icing.  I cut the recipe in half thinking they would already be sweet enough - and they are!  I think they would also be delicious without the icing!
 
I also managed to put a new fabric stack together...
 
 
I love these bright colours and polka dots! I fell in love with the print on the bottom (found on Etsy) and bought 2 1/2 yards with no idea what I was going to do with it!  I finally decided on a Road Trip Quilt (tutorial here)! I thought it would be a great way to show off this cute print! I've made at least one quilt from this tutorial and I love the way it turned out. It's a great pattern when you only have one print!  I think I may even do straight line quilting on this one!


I managed to get the pieces cut out but haven't started on the layout yet.  I'm a little OCD when it comes to laying out my quilts. It takes me forever and I tend to procrastine. I spend a ton of time moving things around, taking pictures, etc., trying to get the perfect balance of colour.  It drives me crazy when the same colour touches - not sure where that comes from! I'm really looking forward to finishing this one as it includes some of my favourite fabrics and colours and I can't wait to see the end result!


Sunday, February 3, 2013

ONE NEW THING WEEK 6

So...This week I decided to try out a tutorial I have looked at a zillion many times! I finally got frustrated enough with my earbud wires getting tangled and getting lost in my bag...so I made this!


Isn't it cute!  It's certainly not perfect and I had a few minor issues putting it together.  I'm just glad I won't have to fight with my earbud wires any more!  Tutorial can be found here!

And, I managed to get started on another quilt this week!  Now, I know there are different ways of making half square triangles.  I have always used the method of cutting squares, drawing diagonal lines, sewing on each side of the line and cutting them apart. I find this process almost unbearably tedious and I just haven't had much success with this method!  I seem to have a lot of trouble getting nice sharp points.  This time, I decided just to cut my squares in half and not worry about the bias edges everyone goes on about. Here's my pile of cut fabric...


After sewing the triangles together and tons of a little trimming...I ended up with this nice little pile of (accurate) finished squares.


When it came time to sewing these together I had a much easier time getting nice sharp points. Here's a little peak of the finished top!


I'm really happy with the way this turned out.  I love how the colours pop against the white fabric. I can't wait to get this one finished. The backing is going to be the green polka dot fabric! This quilt made a serious dent in my Ann Kelle fabrics. Time to restock!  I love them so! (And, for anyone interested, I started with 5 inch squares cut in half diagonally and trimmed the finished squares down to 4.5 inches.  I needed 90 squares total - that's 45 white and 45 print squares cut in half diagonally [I think - I never seem to get the math right with HST's])!


Sunday, January 27, 2013

ONE NEW THING WEEK 5

Okay...Back to more 'quilty' things!  For my new thing this week, I decided to tackle something I have wanted to try for ages!  It's no big deal, really. It was simply setting quilt blocks on point.  For some reason, the idea of doing this terrified me.  I think it was the setting triangles. I just couldn't seem to wrap my head around it. Anyway, I read tons a few tutorials, crossed my fingers, and pulled out my cutter!  Here's the result...


I'm absolutely thrilled with the way this turned out and I absolutely love it!  I bought this bundle of Annie's Farm Stand ages ago.  Here's a closeup of what I think is the cutest print...


These fabrics are so vintagey.  I wish I had enough to make curtains out of the seed print! I also love how the binding looks with the print on the back...


When I pulled this fabric out, I had forgotten that I had already cut a bunch of 3 1/2 inch squares for a patchwork quilt  I wasn't sure I had enough left over to put this quilt together.  After some 'creative' cutting and a little breath-holding, I managed to squeak out just enough after adding a few coordinating prints from my stash. Here's the pre-construction pile...


I didn't have enough fabric to cut five 8 inch squares for the setting triangles.  I was able to cut one, and after cutting it in half twice, I used one of the triangles as a template so I could use smaller pieces of fabric for the setting triangles.  Pretty clever if I say so myself.  Putting the top together was a breeze. I've always liked the look of blocks set on point and I'm looking forward to making many more of these!

Friday, January 25, 2013

AT LONG LAST...A FINISHED QUILT!

I FINALLY managed to finish a quilt! Yay!!!! It's almost the end of January!  What took me so long!  Anyway, here it is...


It was almost impossible to get a decent shot of this quilt.  The rare January sunshine was creating all sorts of shadows! I absolutely love these Ann Kelle prints. They are so much fun to work with and so colourful. I can't decide which one is my favourite.  I also have a ton of them in boy prints, too! I love the way this quilt turned out. It's heading to my poor neglected shop!
Linking this post up with Amanda Jean!

Sunday, January 20, 2013

SOMETHING NEW, AN ALMOST FINISH, AND MORE GIANT BLOCKS!

How's that for a long title! First up, here's my new thing for the week...Blueberry Oat Quick Bread.


I've had this recipe in my favourites for probably over a year!  It came together quickly and tastes delicious (I had a tiny slice just to make sure)! This recipe is definitely a keeper!

And...because this is really a blog about quilting, here's an almost finish...


I managed to get the binding sewn on today and just need to hand stitch it to the back.  I love how this one turned out.  This is the second snowball quilt I've made. I must admit...I don't really enjoy the process. It's a tad bit tedious and the quilting is a little challenging with all those seams! I do love the end result, though. Can't wait to see this one all crinkly out of the dryer!

I also managed to get a few more of these completed...


It's no secret that I'm not really crazy about big blocks! These ones actually measure about 12 inches! I have to say...these have been fun to make and are so quick. I only need to make nine to make a decent-sized baby quilt!  I made a quilt like this previously (I blogged about it back in October) and sold it at a Christmas craft fair a few months ago and I've been wanting to make another one similar to it.  I finished another block this afternoon - four more to go! I have a coordinating green polka dot for the back and I'm going to do the "organic boxy meandering" I did on the last one.